Many essential things are discussed in depth in the hiker scene when it comes to long distance hiking. There is a lot of high quality recommendations and feedback on gear, food & planning. That’s why I don’t even want to bother taking this topic up again.
But I would like to share some of the small and little things which I discovered during my last 8.000km of hiking. Little things which made my hiking life a lot easier or which I found extremely important for an enjoyable hike, a sustainable setup and time & weight savings on the journey.
1. Clothes line in the tent
Usually there are two loops in the top corners of most tents. Get a very thin line or even a fishing line and tie a piece betweeen these two loops. You will have a perfect cloth line in your tent to hang socks or other wet/damp items. If it’s warm enough you will have a chance to dry them. And they are also off the ground which will minimise the risk of mice getting them or being attracted by the smell.

2. Gaiters
If you wear trail runners do get gaiters. Since trail runners have a low cut they are prone to collect a lot of little rocks, sand and branches which you kick up while walking. They are now offered by most companies and these tiny little things are great. They have two great advantages: Firstly you don’t have to take your shoes off so often anymore to prevent bilsters from rubbing and secondly you will make your shoes and socks last longer. Every little sand crystal stuck in our sock will create more friction between it and the shoe with the consequence of getting holes earlier.

3. Waterproof gloves
There are times where you wish you had waterproof gloves. This usually happens when it is a bit chilly, it rains and you get a bit of wind. With your hands on the poles they are very exposed and they also don’t move much by holding the poles. With this the circulation is also not supported much. Does it make sense to carry big and heavy water proof gloves. Usually not. An easy fix for this are zip-lock bags. Take a gallon bag or smaller, put a little piece of ductape over one of the side-edges and then cut a little hole in that piece. That’s were you can stick your trekking pole through and your hand will go through the regular opening of the zip-lock. Voila. Ultralight-waterproof gloves:

4. Camera clip
If you carry a camera, especially a bigger one – make sure it is accesible. There is NO sense of carrying a camera which is in your backpack. You will never take your backpack down every time there is a potential photo opportunity. Trust me. And more over many photo opportunities don’t even last long enough to take your pack down and get your camera out. Especially when you are taking pictures of wildlife. I started out carrying my camera in a classical camera bag strapped on my chest belt. It works perfectly fine. The only two disadvantages are that the bag stats bouncing once you go a bit faster and you always have to strap and unstrap it when you take your pack up and down.

Now I use a tiny little clip with a little shell which I can pull over the camera to protect it from dust and water. It’s a game changer!


Camera can be released with one hand and is always accesible. If you a carry a heavy camer make sure you can also make us of it. Otherwise don’t carry it. This is the Peak Design Clip I use for my camera: Pro Clip
5. Food rotation
One of the toughest things at the end of a long distance trail is to actually find something you are willing to eat and which you are not sick of already. Therefore: make sure you rotate your food everytime you can. Even though you might still like it and could do it another turn try not to. Safe it for later so you will be able to eat it until the very end. Because once you have overdone it with one thing it’s very unlikely that you’ll be able to eat it again on the trail. And it sucks to stand in front of a huge candy bar isle not being able to pick anything because you can’t stand it anymore…

6. Take care of your feet
Tackled very often but can’t be taken up often enough. Your feet. They are the most important thing on a thru-hike. They carry you and your gear. If you don’t take care of them you will have to suffer with every step or even have to go off trail. The biggest mistakes I (and I guess most of us) have made is to ignore the little signs. Especially at the beginning when you are not fully “grooved-in” this becomes crucial. Therefore: If you only feel the lightest rubbing, pinching or whatever. Stop. Don’t think it will be ok for another hour or for the day. If you hike 25 miles a day the slightest rubbing will lead to irritated skin or a blister eventually. To heal something like this on a trail is painful. It takes forever since you usually walk on your feet every day and they don’t get the brake to recover. Therfore take a quick break and solve it. If it is a rock in your shoe, take it out. If you have a hole in your sock, change it. If you feel a rubbing, get leuko-tape and tape the area properly. If the tape comes off. Fix it. Prevention is easy but we tend to think it will be ok. Don’t let it come so far.
The second point is hygiene. Especially when you sweat a lot during high temperatures make sure you wash your feet and socks as often as you can. Take them off during a break, wash both and if you don’t get them dry rather walk in wet socks than dirty ones. Your sweat will build little crystals which will function like sand paper on your feet and especially soles. Once you have open spots it’s easy to catch infections. So keep them shiny and clean!

7. Duct tape – reduce your base weight
Duct tape is a great tool to fix many things. But you won’t need an entire role of tape to fix something until you get to a point where you can take of any issues properly and with unlimited ressources. Therfore don’t roll it on a pen or straw but around your trekking poles. You will therefore not have to carry it on your back and safe precious space in your pack.

8. How to fix cracks in your heels
Sometimes I do get problems with my heels developing cracks. It’s hard to heel this. As long as they stay closed and don’t open up to much they are usually not a big issue. But if they rip further and you start developing an open wound also the problem with infections can arise again. An easy and very effective way to fix them is to use standard super glue! It sounds a bit odd but it works. It keeps the cracks together and stops them from ripping further.
9. Only carry what you need until the next resupply point
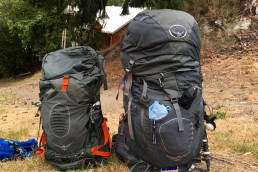
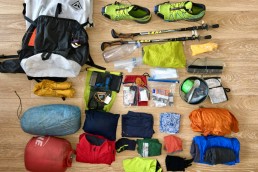
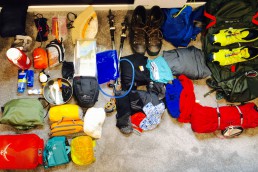
Don’t carry anything you don’t need! Every step is going to hurt more long term and you will increase the risk of injuries. Therefore – get rid of everything you don’t need. And if you have stuff which you will only need for a certain stretch don’t carry it the entire way. Send it to where you will need it and once you are out also send it away. Either find a friend where you can store stuff or bounce a box a couple of time until you can pick it up again. More room in your back = more space for chocolate 😉

10. Use two separate food bags
I find it very helpful to use to separate food bags. One for my breakfast and dinner food and one for snacks and lunch. Why? Because I can leave the breakfast and dinner bag in my pack and I will only have to get a smaller bag out without going through my entire food. And on top it is easier to pack in your backpack if you don’t have one giant but two smaller bags.

11. Sleeping pad size
You don’t necessarily need a sleeping pad that is long enough for you. If you are inbetween sizes go for the smaller one. Or even try to go one lower. Seldemly you do lie fully extended on your mat anyways. And on top you can also trick a bit. I usually build a pillow out of my jumper and my downjacket. The pillow does not have to lie on top of the mat – 20cm saved. And also our feet can be bedded on your pack or other equipment items instead. So even with 1,90m (6’2) I can easily go with a small mat and save some weight and space… 😉

That’s it for now. I’ll think of a few more and if you want I’ll put together another set.
Let me know if you have any little tips and tricks you would like to share! I am always curious to learn more. Just leave me a comment…
Related Posts
20. November 2017
Te Araroa Gear List
20. October 2017
My final Pacific Crest Trail / PCT Gear List
21. January 2016
Queenstown – first gear review on the Te Araroa
26. December 2015
Bye bye Germany
21. November 2015
Preparation
14 Comments
Add comment Cancel reply
This site uses Akismet to reduce spam. Learn how your comment data is processed.

Are your food bags bear proof? If so where is a good place to get them at fairly cheap?
No, they are just really light stuff sacks. I always did hang my food bags in a tree with a rope and carabiner. And in the Sierras of course I had a bear canister. The bear/rodent proof bags are nice because you don’t have to find a tree every night but I wasn’t willing to carry them…
How would you recommend fixing an air matt ( assuming that I got a generic one that didn’t come with a fixing kit )
It depends a bit which material your matt is made of. I would take it to one of the outdoor stores and see what kind of tape they have. There are different types depending on the material. They probably even have specific ones for air matts. If not maybe contact one of the manufactures for a repair kit. Does that help?
Send the needs to where it needs! Any actual examples such as snow gears? Where do we need them (for nobo) and in which post offices best help?
Which trail are you considering to hike? The PCT or TA?
I m a 2018 PCT hiker, thanks!
I am working on a little summary regarding resupply. I’ll incorporate that info in the next article, ok? I’ll let you know when it’s online!
Here you go – my recommendation is online:
http://dowhatmakegood.de/my-re-supply-strategy-for-the-pct/
Nice post. I like the two food bags idea. I just had one bag, so I would pack it strategically to try to have what I wanted on top when I wanted it.
I would just like to add that plastic bags also make great shoe-liners if you have to walk through fresh snow or if there’s water running down the trail. Bread bags are the best (although I realize thru-hikers don’t eat a lot of bread). I learned this in the Olympic Mountains where it rained for 11 days straight. I still got trench-foot, but they kept my feet warmer.
I’m trying to think of something you don’t know, and all I can come up with is Fritos. I can’t verify either of these facts but I’ve been told that Fritos (corm chips) have the highest calorie to weight ratio of pretty much anything, and that they can be used to start a fire if you need a fire-starter!
OK, I thought of something I learned on my hike that might be useful to others. I pretty regularly go poo right when I wake up. Sometimes that’s WHY I wake up. As soon as my eyes detect daylight, it’s time to go. It took me about 1000 miles to figure out to dig my hole the night before, so it’s all ready to go when I am. This avoids hastily, panic induced hole digging.
The night before leaves plenty of time to find a good spot and take my time digging a nice deep hole. It’s also nice knowing it’s out there if the urge should come in the middle of the night, because finding a spot and digging a proper hole when you gotta go NOW and it’s dark and you’re not dressed properly is no fun.
Hey, thanks for sharing!! This is such a great story. I had the same rhythm – so funny. And I honestly thought about doing the same thing every evening. But guess what. I never managed. Instead I had to run out of my tent every morning looking for a spot ending up digging the hole afterwards every second time… 😂 You steppd up the game, bro! 😎🤘
The tip for using zip locks as waterproof gloves CHANGED MY LIFE! Thank you!!!
I am glad you like this one. Very often the easy things are the best!! 😂